1. To add a new transfer, go to Transfer -> Add Transfer from the menu bar. This will redirect you to the Add Transfer page where you can create a new transfer record.
First, select the location type (Warehouse to Warehouse, Warehouse to Branch, Branch to Branch, or Branch to Warehouse).
-
If you select Warehouse to Warehouse, the From Warehouse and To Warehouse options will appear.
-
If you select Warehouse to Branch, the From Warehouse and To Branch options will appear.
-
If you select Branch to Branch, the From Branch and To Branch options will appear.
-
If you select Branch to Warehouse, the From Branch and To Warehouse options will appear.
After selecting the locations, you can search for and add products to the transfer table.
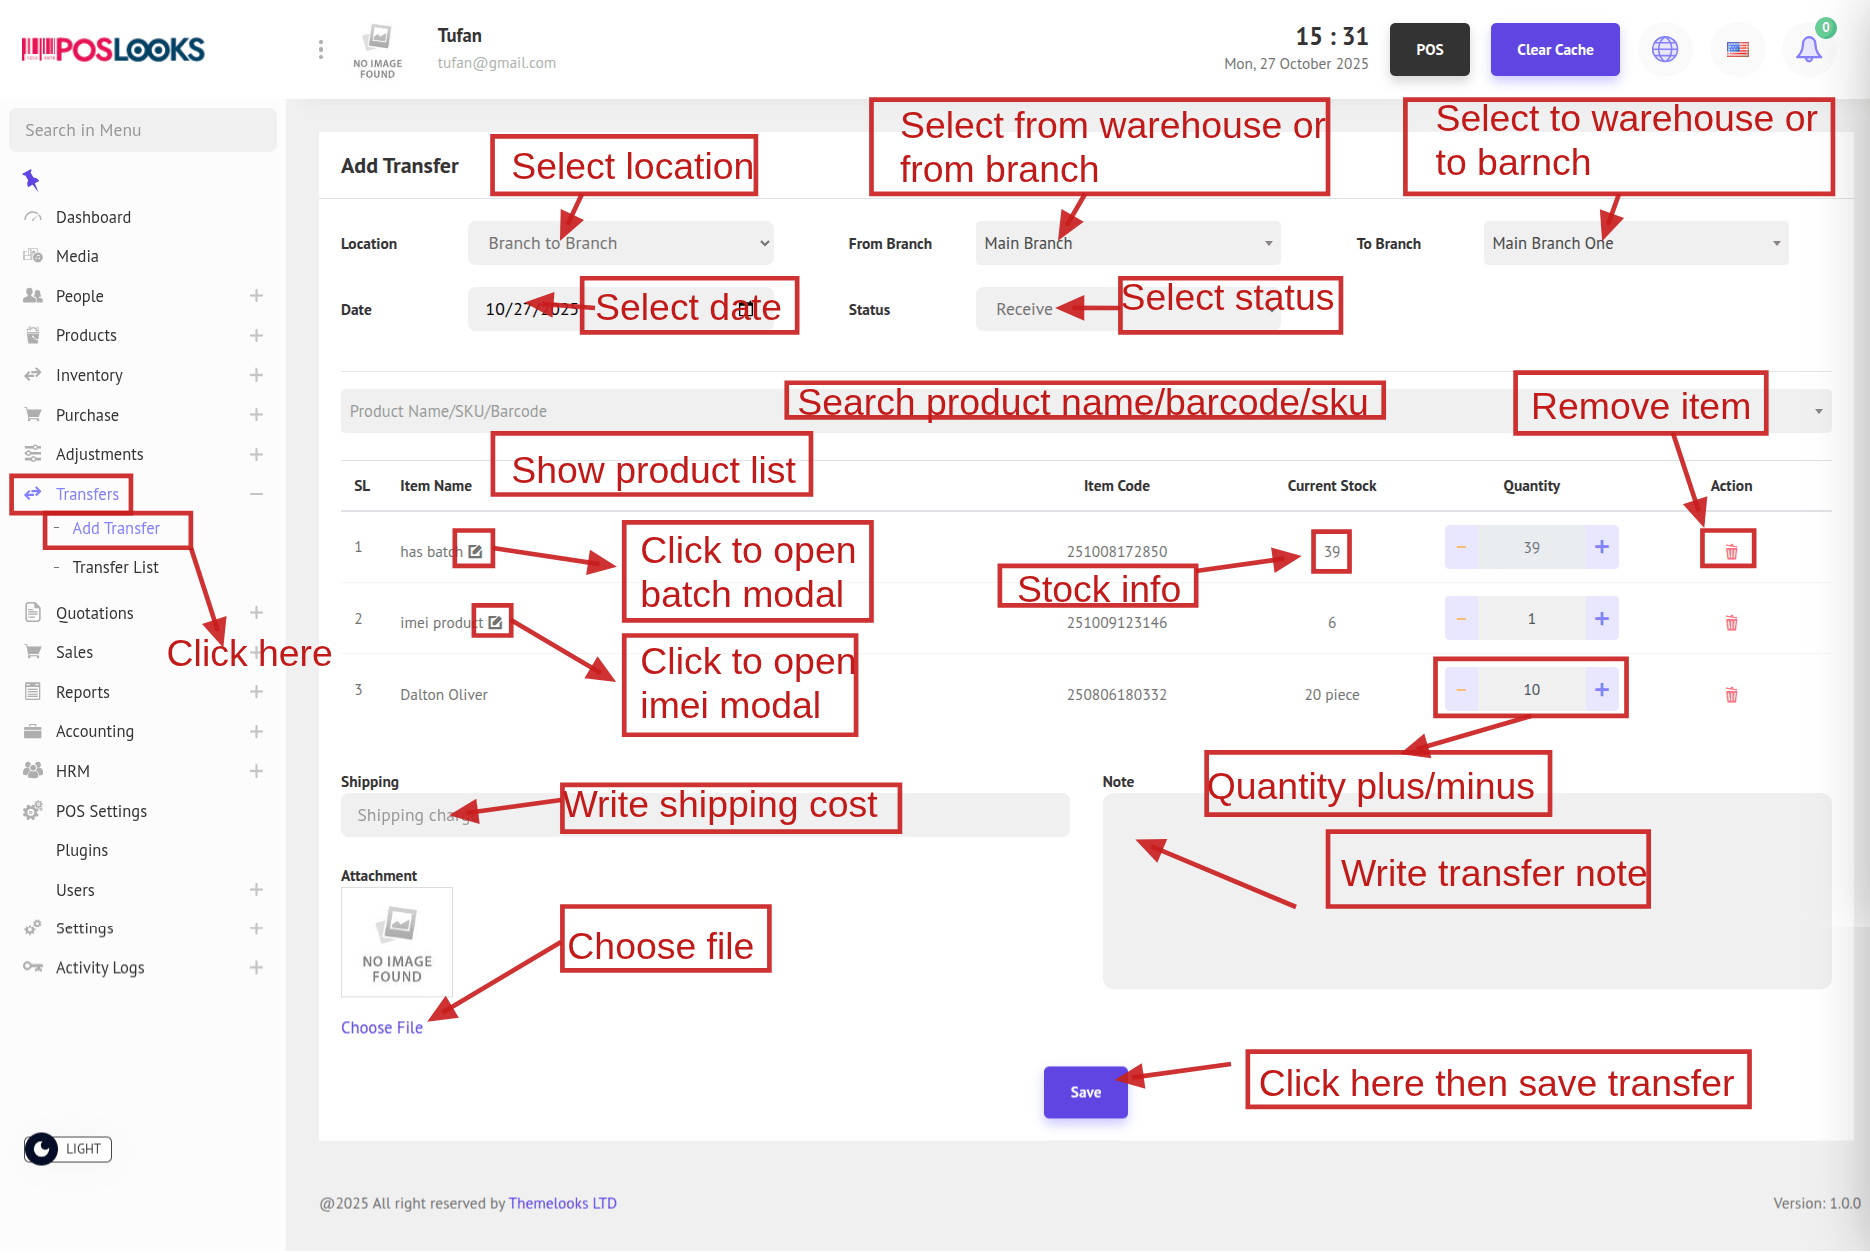
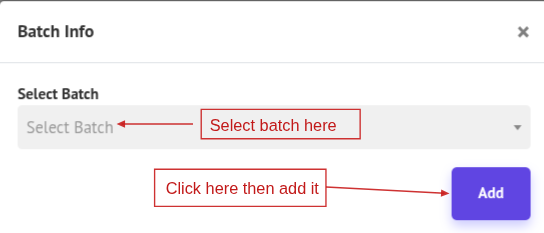
If the product has a Batch, a popup modal will open. Select the batch and click Add. To edit it, click the Edit icon — the batch modal will open again. Change the selection and click Add to update it.
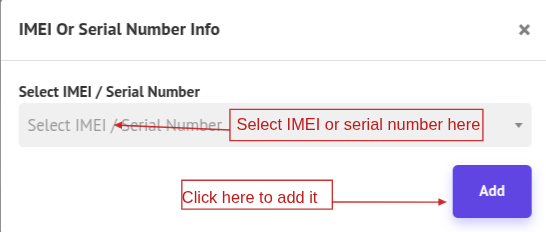
If the product has an IMEI, an IMEI modal will open. Select the IMEI and click Add. To edit it, click the Edit icon — the IMEI modal will open again. Change the IMEI and click Add to save the update.
2. To see the Transfer List, go to Transfer -> Transfer List from the menu bar. You will be able to view all transfer on the Transfer List page.
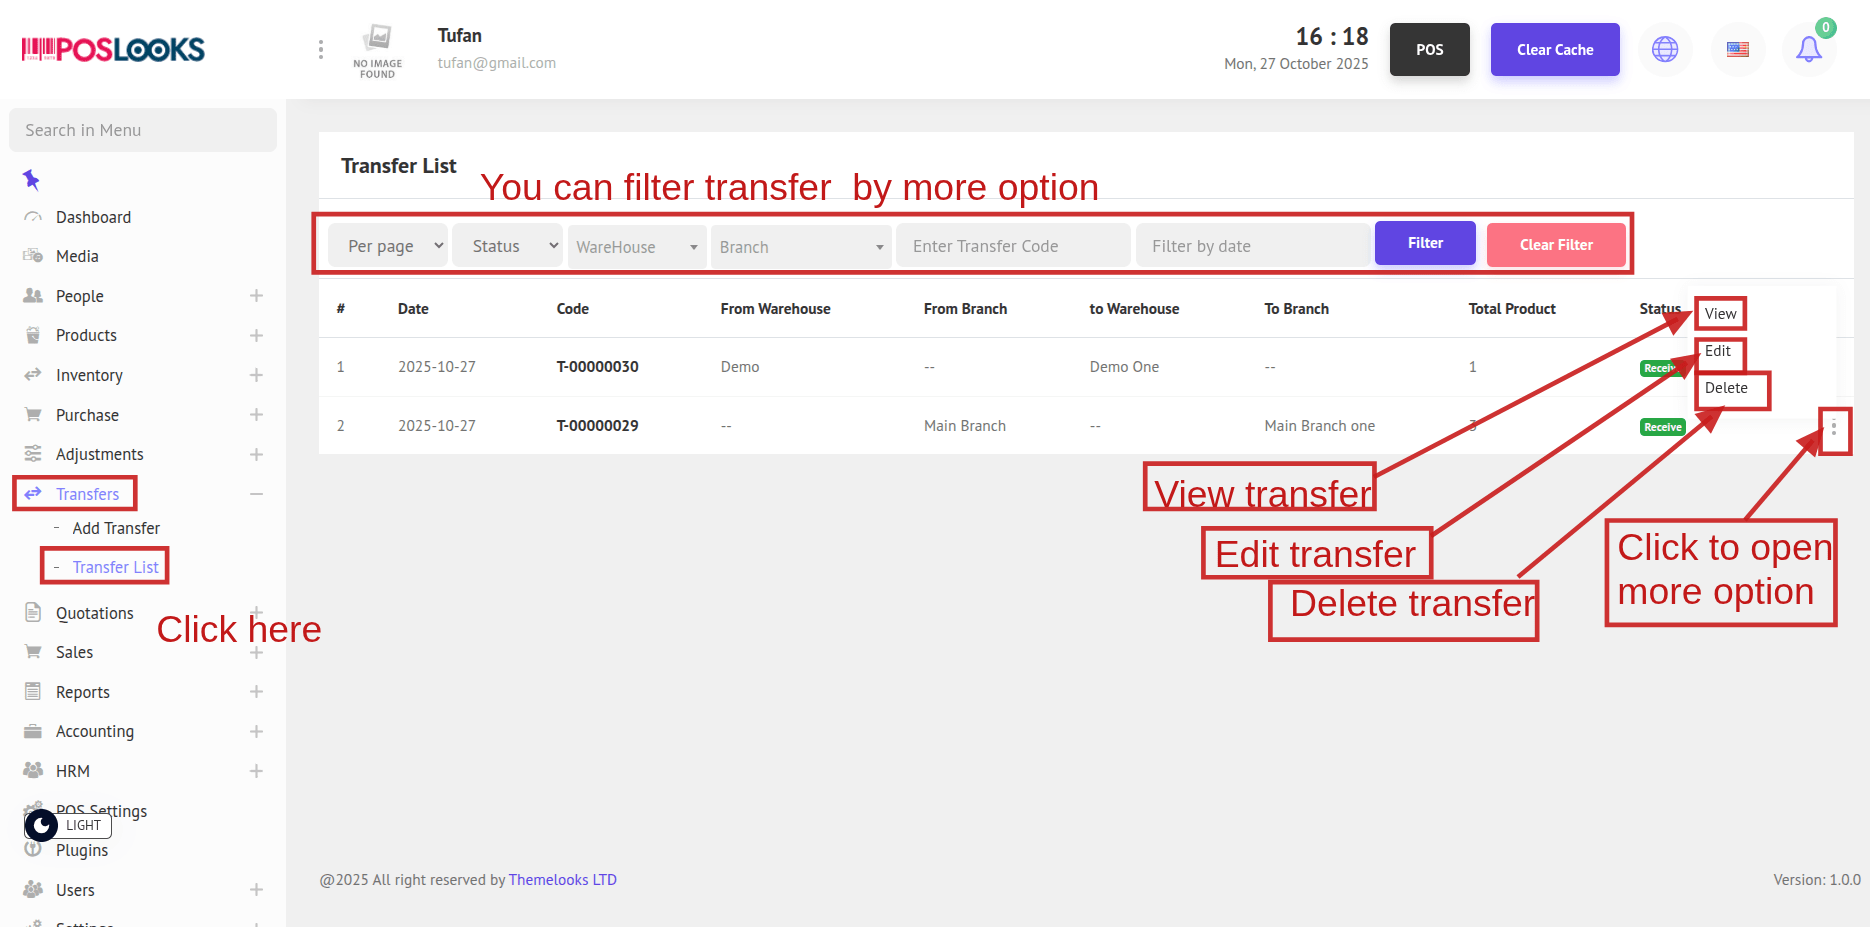
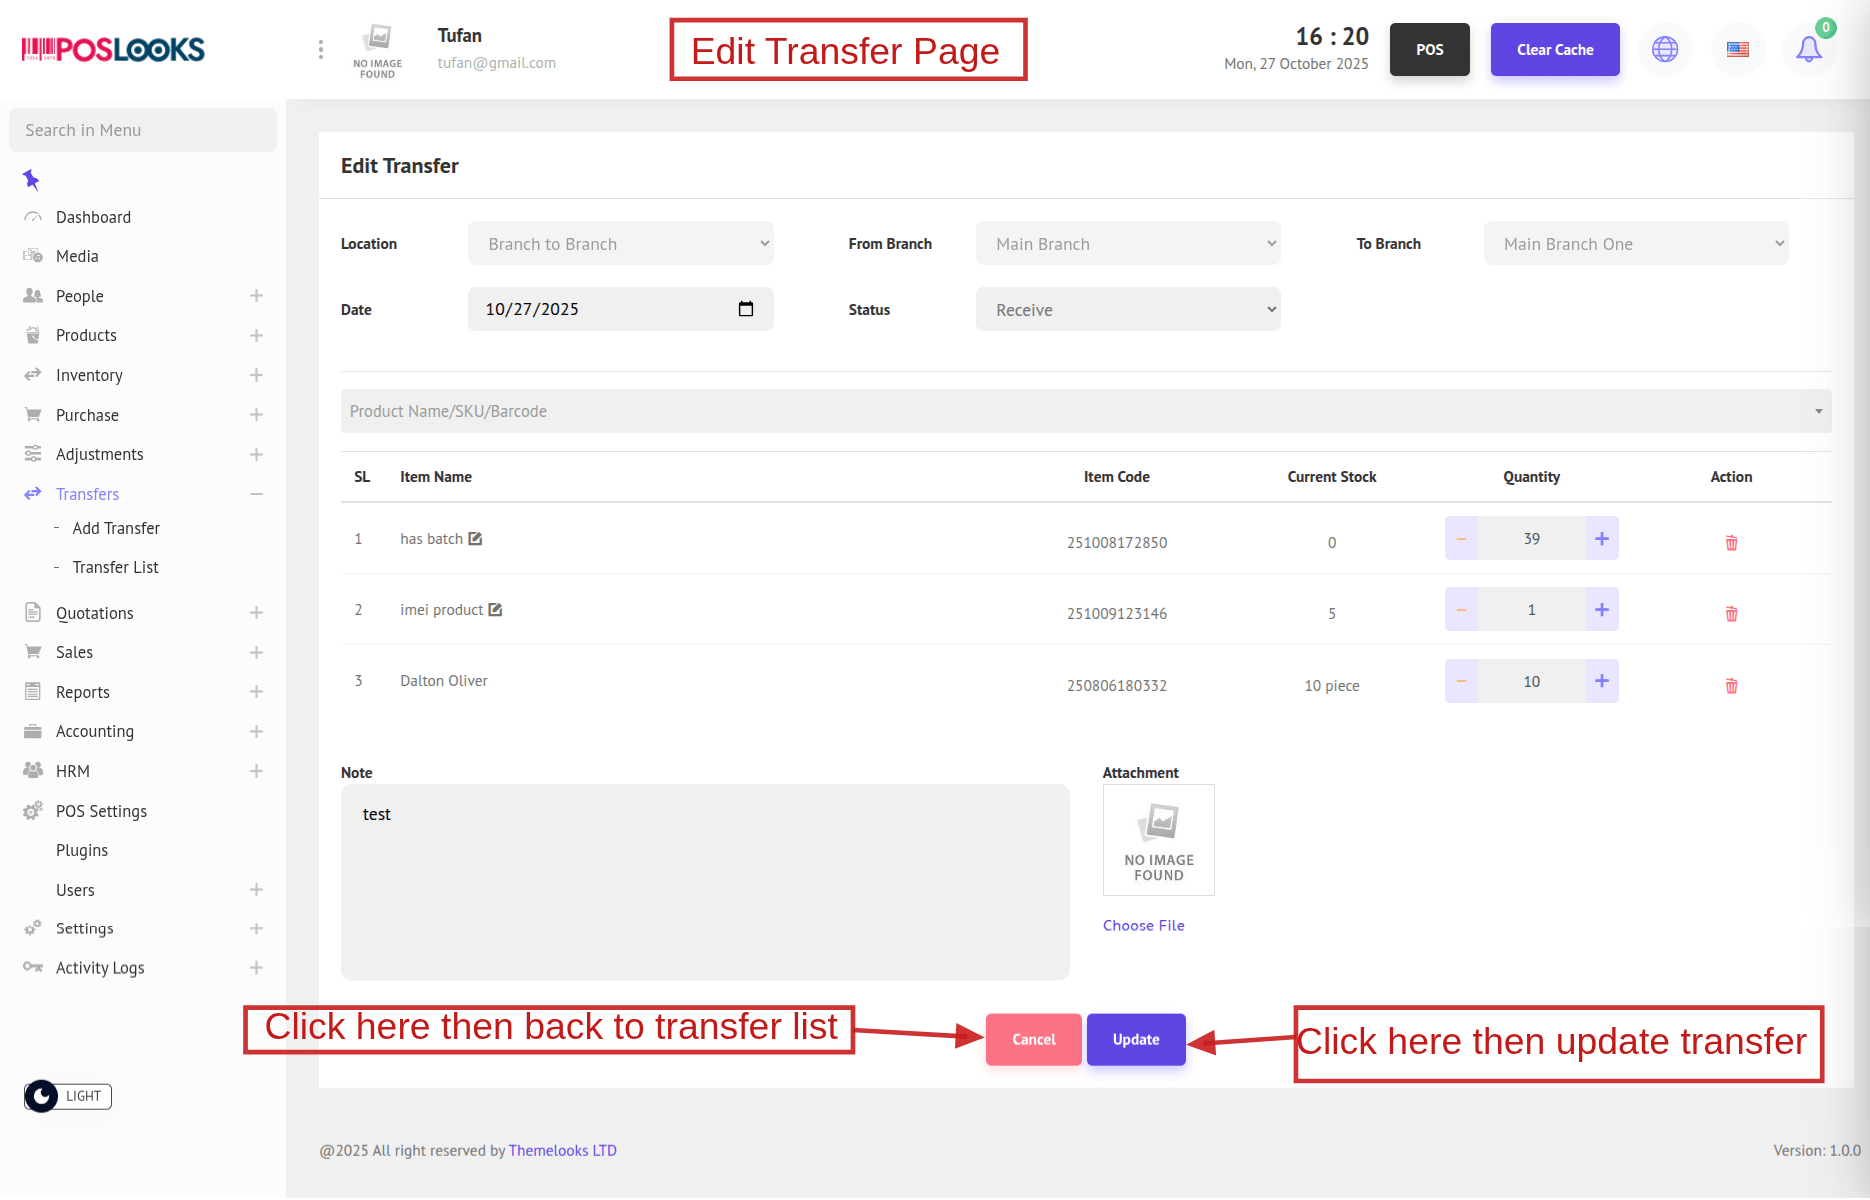
To edit a transfer, click the Edit button. You will be redirected to the Edit Transfer page, where you can make changes to the data and click Update to save. If no changes are needed, click the Cancel button to go back to the Transfer List. You can also delete a transfer by clicking the Delete button.
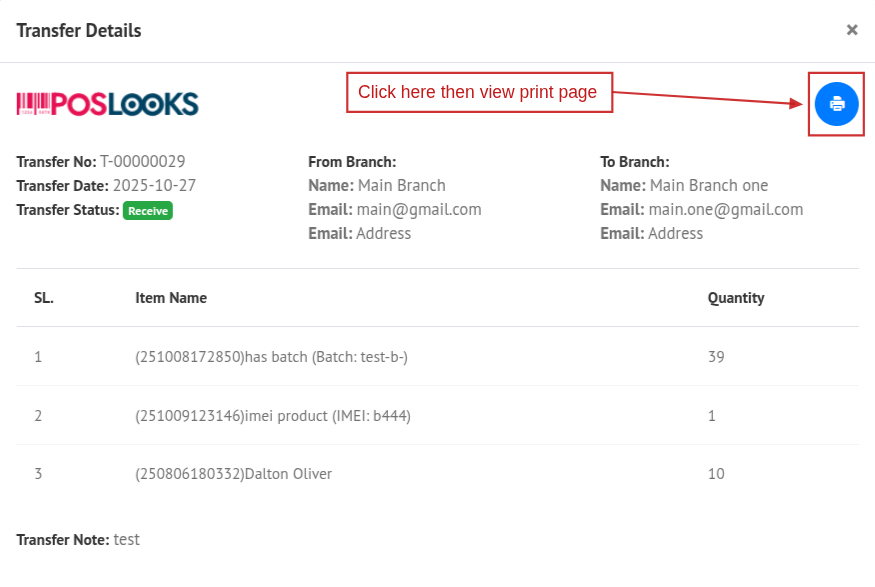
You can also view the details of an transfer by clicking the View button. A popup modal will appear showing the transfer details. You can print this page by clicking the Print icon, which will open the print view.